Friday 22 May 2015

Love You Darling Girl

Hi all. This week has been pretty wet here in HK, after months of dry, cool weather. Ironically, my sister in-law and nephew will be arriving for a one week holiday (getting away from the cold and wet in the UK) and now they are coming here for more of the same. Fingers crossed the rain will hold off for the week.

This week, I managed to get just one layout done. I've now had to move half my scrapbook stuff from the study to make way for a blow up bed for my sister in-law, so no more layouts for a week or two.

Love You Darling Girl
 I love the colour combinations and little embellishments. The photo was taken on a forest patterned wing back chair at a shop and I love the dark colours against Miss C's outfit.
 Cute die cuts add layers and dimension from Crate Paper.
 I love the plastic leaves which match the photo and you know I love my little clusters of flowers.
 I added some chevron patterns with molding paste on the background. I went into my stash for the wooden accent and star pin.

Products Used
Papers and acetate shapes from Crate Paper Confetti collection
Die cuts from Crate Paper
Wooden accent, gold rub ons from Studio Calico
Gold star pin by Maya Road
Gold paint and black ink by Ranger Inks

Thanks for dropping by and will see you in a couple of weeks.


Icicles in Tutus

Hi there. I can't believe I've not scrapped these photos yet. I know I printed them out a while ago and thought I had already done a layout, but I guess not.

Miss C loves her ballet lessons and every year, the ballet school puts on a performance. Last year's theme was called Ask Alice and featured Alice in Wonderland but with a twist and had a snow queen as well as other characters. Miss C was one of many 'icicles', with their beautiful blue tutus and as there were an odd number of them, one icicle (mine), was chosen to do a short solo with one of the principle dancers. I was so proud of her, seeing her come down the middle with the snow queen, I actually burst out crying. So silly.

Snow Queen's Icicle
 I didn't have any winter themed papers to go with the photos, so I chose some nice vintage papers and added some icicles as accents instead. That sort of pulls the papers in to match the photos.
 I heat embossed a couple of layers of blue embossing powder to some scrap paper before die cutting out the icicles. I added flowers as well to bulk out the page.
I splattered gold mist on the background paper and added a few bling brads to make the layout sparkle a bit more.

Products Used
Papers by Blue Fern Studios and Marion Smith Designs
Flowers, title alphas and bling brads by Prima Marketing
Embossing powder by Lindy's Stamp Gang
Gold paint by Ranger Inks

Thanks for dropping by,


Thursday 7 May 2015

My Brave Super Star

Hi there.  Looking through my photos, I realize there are so many photos I still haven't scrapped. Sometimes, you just have to be in the mood to scrap particular photos, you know what I mean? Like the following sports day photos. For some reason, today was the day to scrap them.

I was looking through the My Creative Sketches blog and wanted to utilize some of the previous sketches, even if the sketch challenges were over.  I chose the one from the February challenge; perfect for multiple photos, and in fact I used a 2x4 grid rather than the 2x3 grid in the sketch.


My Brave Super Star
Another year, another sports day. This actually took place in November last year and it's taken me this long to scrap them. If you look at the above sketch, it only has three photos but I like how my layout has turned out without being too busy.
I did a torn border for the title strip. It gives a bit more texture to the page than just a cut edge. I love the ripples on the corrugated title.
 I'm not huge journaler but this story had to be told. Poor little Miss C, she really was so brave. A few tears in her eyes but she kept a stiff upper lip, pick herself up and finished her hurdles and all the other events.
What luck to find this sentiment in my stash. The elephant is just too cute so he had to go somewhere.

Products Used
Blue diamond and green striped paper and Today journaling card by Echo Park Anything Goes collection
Numbers paper, die cuts, frame, stickers words and washi tape by Amy Tangerine
Green corrugated Thickers by American Crafts
Small brown circle letters by My Mind's Eye Citrus Twist
Stars by Freckled Fawn

Thanks for dropping by,


Congratulations to Belly Lau

A quick post to convey my congratulations to Belly Lau, the owner of HK MemoryChest (Papercraft Buffet) on making the design team of not just one, but two amazing companies: Maya Road and Graphic 45.

Apart from the wonderful scrapbooking layouts that you see every month on my HKMC kit posts, Belly is also an avid paper decor crafter, making boxes, mini albums and beautiful 3D projects.

Well done Belly and I can't wait to see all the gorgeous projects you create.


Saturday 2 May 2015

Creating a Water Colour Layout - Tutorial

Hello there. As per my previous post on the HKMC May kit, we had a lot of fun playing with water colour papers from Cosmo Cricket.

It may be a little intimidating for some to try this technique and I admit even I had qualms to start with, but the beauty of this type of water colouring is, it's meant to have a loose and organic finish and it looks best when you get different colour gradations shading which are trademarks of water colouring.

A Quick Intro
 For my layout "I Will Love You Forever",  I chose this geometric flower paper. You can see the 'hidden' patterns embossed into the water colour paper.
Get your materials ready - a spritz bottle or a bowl of water or a water brush, your water colour palette (you can also use water based dye inks such as distress inks, gelatos or tube water colours). I usually spritz a small puddle of water directly onto the palette to get the colours moving first - don't worry, it dries out quite quickly and won't ruin your palette.
I loaded up my brush with water and dabbed it on the paper in the areas I wanted colour. I then pick up the water colour I wanted on my brush and dabbed it onto the wet areas. The colour should spread out. Add more water and colour to build up your colour. I use a dabbing method rather then brushing across the paper as this leaves more of the water stain look and stops several colours from muddying into each other. I also used the brush to add splatter across my page.

Step-by-step for "H20 Just Add Water" Layout
 Using a large flat brush, I wet the entire page with a good coat of water. I then used a medium to large size round brush to add shades of blue all over the page and dabs of purple in the middle of the flower circles. You can tilt your paper to get the colours to merge and blend together. I also used a bit of pink in some areas. Let it dry naturally, or if you're impatient like me, use a heat tool. You can see where I used a pencil to map out where my sewing hoops would go.
After drying the base colour, I used a splatter stamp to add the dark blue splashes in a diagonal across the the page. I then dried it again with a heat tool. Your paper may warp a bit and you can use an ordinary clothing iron to flatten it out like I did. I then stamped the hashtags randomly around the page - this is where my pencil lines come in handy as they show me where my hoops will go and I don't stamp under them.
I die cut some branches from leftover water colour paper and coloured them with greens and browns before drying them. I arranged them so they branch outwards from the hoops. I don't stick them down yet.
I smeared glass bead gel mainly along the diagonal with a few branch outs to the sides. While the bead gel is still wet, sprinkle on the gold flakes. The glass bead gel will dry clear and you will see the texture show through then.
I layered and stuck all my elements on top: my photo hoops, foliage and flowers.
I finished off with the title and that's it. I love the look of the glass beads peeking through under the gold flakes. You should be able to find glass bead gel in good art shops.

I hope this step by step is a bit of help to you. Drop me a line and would love to see the projects you create.

Happy scrapping,


HK Memory Chest Kit Club - May 2015

Hello there,

Can you believe it's already May and we are revealing the second last kit of the 2014/2015 HKMC kit season? As I said in a previous post, I can't wait to show you the May kit. What fun I (and the rest of the design team) had with these kits. When I saw this during the Winter CHA releases, I fell in love with it and I'm so glad HKMC has added it to this month's kit.

Water colouring seems to be a huge trend in scrapbooking and it is so fun to experiment and play around with colour. The Cosmo Cricket water colour paper in the kit comes with pre-printed "hidden" designs; just add water colour and see them appear like magic. In addition to the paper, there is again a ton of embellishments in the kit, including a water colour paint palette so you can get started on those layouts straight away.


May Kit 2015
Cosmo Cricket 12"x12" Watercolour Paper Pad
Watercolour Paint Set
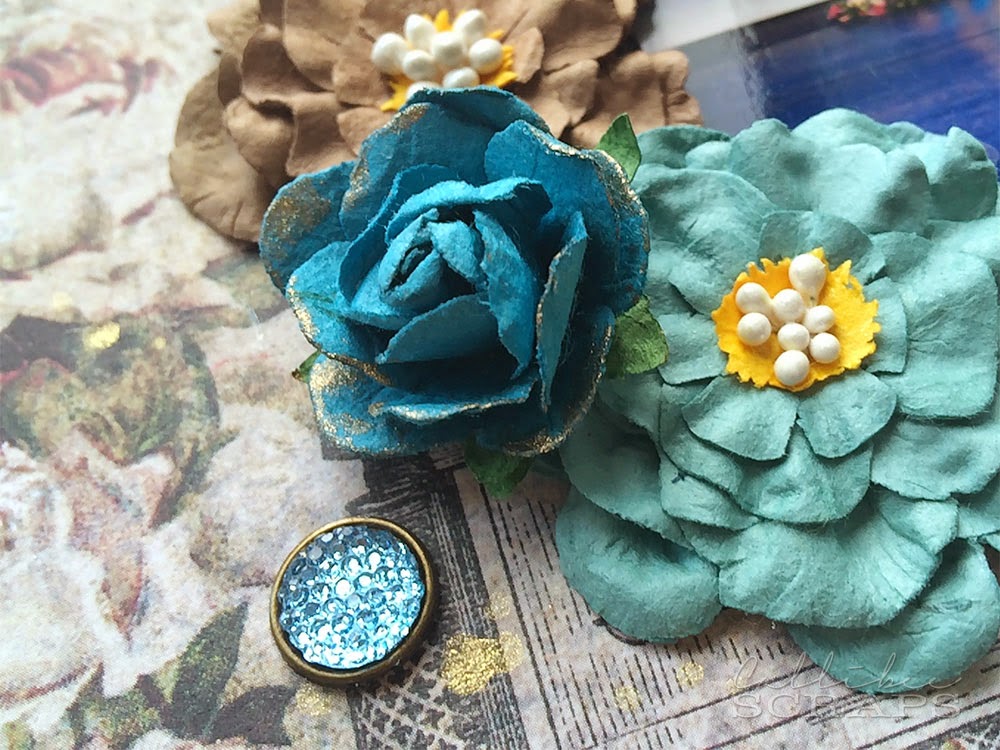
Prima Watercolour Mulberry Paper Flowers – Aquarelle
Prima Art Ingredients Mica Flakes 1oz – Gold Leaf
American Crafts Mini Bags 3.94″X2.6″ – White
Bo Bunny Double-Dot Alpha Stickers 12″X12″ – Tuxedo
Crate Paper Craft Market Ephemera Die-Cuts
Crate Paper Craft Market Printed Wood Crate Paper Veneer Shapes with Gold Glitter Accents
Crate Paper Craft Market Wood Veneer Hoops – 2.5″ To 4.5″
Cottage Living Stickers – Jewel
Cottage Living Jumbo Paperclips – Gold
Gold Twine
Felt Pom Pom – Assorted Colors

Optional Add-ons
Tim Holtz Water Brush – Broad Brush Nib – 6″
Craft Market Self-Inking Stamp Love You To The Moon & Back
Craft Market Standouts Layered Stickers With Burlap Accents

Here's the sketch for the month based on one of Belly's layout:


 H2O Just Add Water
I love the colours of the background, which I tried to tie in with blues and purples in the photos. It's a bit of a balance not to have the background overwhelm the photos and still have them stand out. The title comes from a kid's show about mermaids.
I die cut some foliage from extra water colour paper and coloured it in. A small cluster of flowers finish the page.
 I added glass bead gels, the gold flakes and stamped some hashtags around the page to bulk up the layout. The water colour paper comes with pre printed patterns that will show up once you add your colours, creating some awesome effects.

Extra Elements: hashtag stamps, glass bead gels, olive branch die

 I Will Love You Forever
I kept the colouring on the background paper subtle as I wanted the pre-printed gold patterns to show through. The paper itself is also pre-printed with a lovely geometric flower pattern. The big LOVE in the photo is a fixture in our community plaza which was placed there on Valentine's - so cute.
I layered up lots of die cuts and a couple of flowers to surround the photo.
I love the sweet die cuts you get in the kit. Great for layering. I used pigment inks to colour the title stickers and water colour for the die cut 'forever'.

Extra Elements: 'forever' die, pigment inks

Sunset Dreams
I've wanted to do a segmented photo layout for a while. The last one I did was a few years ago and I thought this was a good photo to create another. I printed it out so that the focal point (us), would be on the third column. I wanted the photo in black and white so I could create my own 'sunset' background with the water colour paper. I die cut the bottom of the columns into a curve for added interest.
Just one corner of accents to add some detail to the layout.
I water coloured the background paper as a whole piece before cutting it up into four columns. I ran a black marker around the edges to give them definition. The colouring is to mimic the sunset which is in the original photo. A few drops of black paint and gold glitter on the corners allows the eyes to travel across the page.

Extra Elements: tan cardstock, gold glitter glue, stitched edge die

That's My Family
 For my last layout, I did some colour blocking on the background paper in blue, yellow and peach. As the colours were quite strong, I machine sewed on a 12x12 piece of vellum overlay. This muted the colours and allowed me to add my photo and accents on top without being overpowering. You could also just tone down your water colours to begin with but I also love the hint of vibrant colours showing through.
 We were again given a cute embellishment - felt mini balls, so I strung them up on three strands of thread and laid them across the page. I also water coloured the pink heart paper.
A cluster of tickets and tags balance out the top of the page.
Just a few brush strokes of colour across this card highlight the hidden words and brings them out.

Extra Elements: rose die, vellum paper, gold and beige thread

Here are the other DT layouts:

Enjoy The Day by Belly Lau
Just The 2 Of Us 4 Ever by Belly Lau
 At The Stairs Pagoda by Belly Lau
 Artso Buddies
Who's The Best by Belly Lau
Amazing You by Erika Lui
Enjoy Now by Erika Lui

We're changing it up this month for the crop locations. Instead of my crop date at the shop, we're doing it in Discovery Bay at my place. Give me a buzz at 94190193 for directions.
Discovery Bay Crop 
11th May (Mon)
10:30-12:30
Hosted by Grace Wong

Chai Wan Crop
12th May (Tue)
10:30-12:30
Hosted by Belly Lau

I will be posting some step by steps on how I created a couple of my layouts above in the next post, so stay tuned.

Thanks for dropping by and I can't wait to see all your lovely creations. 


You might also like

Related Posts Plugin for WordPress, Blogger...